Beranda
/ How To Install Stainless Steel Backsplash : Stainless Steel Kitchen Backsplash Diy Family Handyman - Apply a line of construction adhesive every couple inches across the back of the backsplash.
How To Install Stainless Steel Backsplash : Stainless Steel Kitchen Backsplash Diy Family Handyman - Apply a line of construction adhesive every couple inches across the back of the backsplash.
Insurance Gas/Electricity Loans Mortgage Attorney Lawyer Donate Conference Call Degree Credit Treatment Software Classes Recovery Trading Rehab Hosting Transfer Cord Blood Claim compensation mesothelioma mesothelioma attorney Houston car accident lawyer moreno valley can you sue a doctor for wrong diagnosis doctorate in security top online doctoral programs in business educational leadership doctoral programs online car accident doctor atlanta car accident doctor atlanta accident attorney rancho Cucamonga truck accident attorney san Antonio ONLINE BUSINESS DEGREE PROGRAMS ACCREDITED online accredited psychology degree masters degree in human resources online public administration masters degree online bitcoin merchant account bitcoin merchant services compare car insurance auto insurance troy mi seo explanation digital marketing degree floridaseo company fitness showrooms stamfordct how to work more efficiently seowordpress tips meaning of seo what is an seo what does an seo do what seo stands for best seotips google seo advice seo steps, The secure cloud-based platform for smart service delivery. Safelink is used by legal, professional and financial services to protect sensitive information, accelerate business processes and increase productivity. Use Safelink to collaborate securely with clients, colleagues and external parties. Safelink has a menu of workspace types with advanced features for dispute resolution, running deals and customised client portal creation. All data is encrypted (at rest and in transit and you retain your own encryption keys. Our titan security framework ensures your data is secure and you even have the option to choose your own data location from Channel Islands, London (UK), Dublin (EU), Australia.
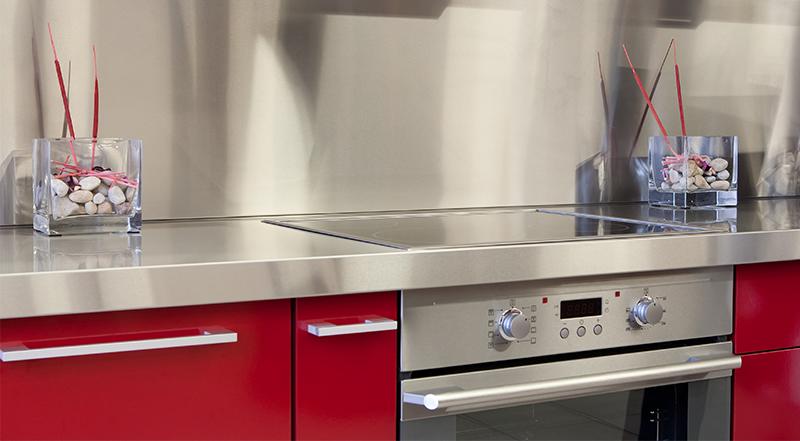
How To Install Stainless Steel Backsplash : Stainless Steel Kitchen Backsplash Diy Family Handyman - Apply a line of construction adhesive every couple inches across the back of the backsplash.. Installing your steel backsplash installation begins by covering the counter with newspaper of old towels to prevent the sharp edges of the back splash from cutting or nicking the counter surface. Lord residential design llc and taste design inc. This stainless steel backsplash estimator will provide you with up to date pricing for your area. Use graph paper or a computer drawing program to plan the pattern and calculate how many pieces of each size of tile you'll need. Set the backsplash in place and hold it while a friend tapes it in place with painters' tape.
What's the best way to attach it without visible fasteners? Hold the stainless steel sheet on the wall where you intend to install it. There are so many ways to make the backsplash looks amazing like using tiles or stainless steel. This video from bunnings warehouse. Use a thinset modified with polymer or latex, compliant with ansi 118.4 and recommended for glass or vitreous tile installation by the manufacturer.
Blog Articles from www.edenmosaictile.com How to glue stainless steel sheets to the wall. According to professional interior designer teri larson, stainless steel has been the most popular choice in appliance finishes for the first part. Smooth out the adhesive with a putty knife to spread it into a thin, consistent layer. Run a bead with the caulking gun then spread it out evenly with the putty knife. Cork is good for metal backsplash installations. Apply a bead all the way around about an inch in from the edge, and a w shape in the middle. Installing metal mosaic mosaic tile step by step The installation is simple enough.
Ask the supplier to cut the stainless sheet to size.
The installation is simple enough. A metal tile backsplash can transform the look of a kitchen. Apply the construction adhesive to the back of the back splash. Install the sleek, functional frigo design install the sleek, functional frigo design 36 in. 3 position the cleat so that. A cleat beneath the panel will support the stainless steel backsplash as the adhesive cures (photo 2). Browse 235 installing stainless steel backsplash on houzz whether you want inspiration for planning installing stainless steel backsplash or are building designer installing stainless steel backsplash from scratch, houzz has 235 pictures from the best designers, decorators, and architects in the country, including elizabeth p. With a simple fabric and warm water, the spots are gone. Another way is to clean the surface using baking soda or vinegar. Ask the supplier to cut the stainless sheet to size. Smooth out the adhesive with a putty knife to spread it into a thin, consistent layer. Most stainless steel is a ceramic base with a metal cap, not solid steel. This stainless steel backsplash estimator will provide you with up to date pricing for your area.
What's the best way to attach it without visible fasteners? Smooth out the adhesive with a putty knife to spread it into a thin, consistent layer. Things that you should know about the stainless steel as your backsplash is on the budget, it has good durability, flexible installation, easy to clean up. Lord residential design llc and taste design inc. A 10 x 10 area = 100 square feet.
Amazon Com Art3d Peel And Stick Metal Backsplash Tile Brushed Stainless Steel In Square Pack Of 10 Tiles 12 X12 Home Kitchen from m.media-amazon.com Installing metal mosaic mosaic tile step by step Make sure you warm it up in water before using. Installing your steel backsplash installation begins by covering the counter with newspaper of old towels to prevent the sharp edges of the back splash from cutting or nicking the counter surface. With a simple fabric and warm water, the spots are gone. While stainless steel is not as common as natural stone and ceramic tile for backsplashes, it is a durable and contemporary choice for the home or office kitchen. Smooth out the adhesive with a putty knife to spread it into a thin, consistent layer. Drill the fastener holes slightly larger than the size of your fasteners. Draw a line on the wall under the bottom of the sheet with a pencil and set the sheet aside.
Browse 235 installing stainless steel backsplash on houzz whether you want inspiration for planning installing stainless steel backsplash or are building designer installing stainless steel backsplash from scratch, houzz has 235 pictures from the best designers, decorators, and architects in the country, including elizabeth p.
Installing your steel backsplash installation begins by covering the counter with newspaper of old towels to prevent the sharp edges of the back splash from cutting or nicking the counter surface. Installing a stainless steel backsplash is easy and fast not only that its clear surface helps you find dirty spots easily, but this material also provides a surface that won't allow stains to stay. This video from bunnings warehouse. Hold the stainless steel sheet on the wall where you intend to install it. Use double sided tape to help hold it in place while the glue dries. Most stainless steel is a ceramic base with a metal cap, not solid steel. How to glue stainless steel sheets to the wall. Apply the construction adhesive to the back of the back splash. Never use ceramic tile mastic for the installation of stainless steel, aluminum, and glass mosaic tiles. A stainless steel splashback can make a stylish addition to your kitchen that also protects the wall behind your cooktop. I'd like to add a stainless steel backsplash behind a stove, between two wall cabinets. Order several extra tiles in case you miscut one or miscalculate the amount. Drill the fastener holes slightly larger than the size of your fasteners.
The installation is simple enough. How to glue stainless steel sheets to the wall. Lord residential design llc and taste design inc. There are so many ways to make the backsplash looks amazing like using tiles or stainless steel. This video is part of kitchen renovations show hosted by fuad reveiz, paul ryan.
Custom Brushed Finish Stainless Steel Backsplashes Coremark Metals from www.coremarkmetals.com The modern kitchen style usually decorates with the stainless steel to add the patterns. Lord residential design llc and taste design inc. While stainless steel is not as common as natural stone and ceramic tile for backsplashes, it is a durable and contemporary choice for the home or office kitchen. Place your construction adhesive in a sunny spot or near a heater vent to ensure it is warm enough to spread evenly, preventing ridges or bumps from appearing in the installed backsplash. Set the backsplash in place and hold it while a friend tapes it in place with painters' tape. Apply the construction adhesive to the back of the back splash. Most stainless steel is a ceramic base with a metal cap, not solid steel. Use a thinset modified with polymer or latex, compliant with ansi 118.4 and recommended for glass or vitreous tile installation by the manufacturer.
Use double sided tape to help hold it in place while the glue dries.
The installation is simple enough. Drill the fastener holes slightly larger than the size of your fasteners. I'd like to add a stainless steel backsplash behind a stove, between two wall cabinets. The modern kitchen style usually decorates with the stainless steel to add the patterns. Use cement board in wet areas like showers. What's the best way to attach it without visible fasteners? Installing your steel backsplash installation begins by covering the counter with newspaper of old towels to prevent the sharp edges of the back splash from cutting or nicking the counter surface. Installing metal mosaic mosaic tile step by step Please like this video :)facebook: Ask the supplier to cut the stainless sheet to size. Use a thinset modified with polymer or latex, compliant with ansi 118.4 and recommended for glass or vitreous tile installation by the manufacturer. This video is part of kitchen renovations show hosted by fuad reveiz, paul ryan. 3 position the cleat so that.